
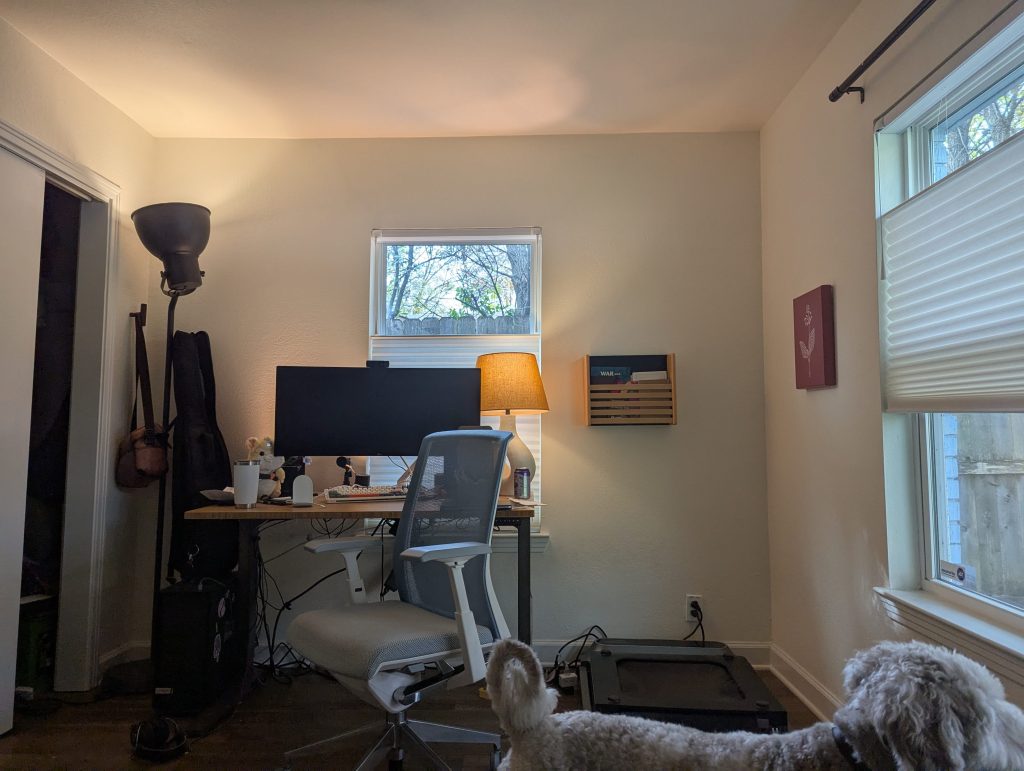
I use one of the three bedrooms in my house as an office, guestroom, and hobby space. For some time, I had been pondering knocking out the closet space for more desk area and custom art/craft storage, and painting the room a bolder color. As a sometimes risk-averse but mostly impulsive person, I decided this time I needed a render before destroying walls.


Blender was my tool of choice. I had previously attempted using Blender to make models for 3D printing, and took an animation course on CG Cookie during a COVID lockdown, so it didn’t feel too intimidating to use it for another purpose. It ended up being a big time commitment, but was worth it to ensure I wasn’t making a huge mistake.
Here’s what I did to get started
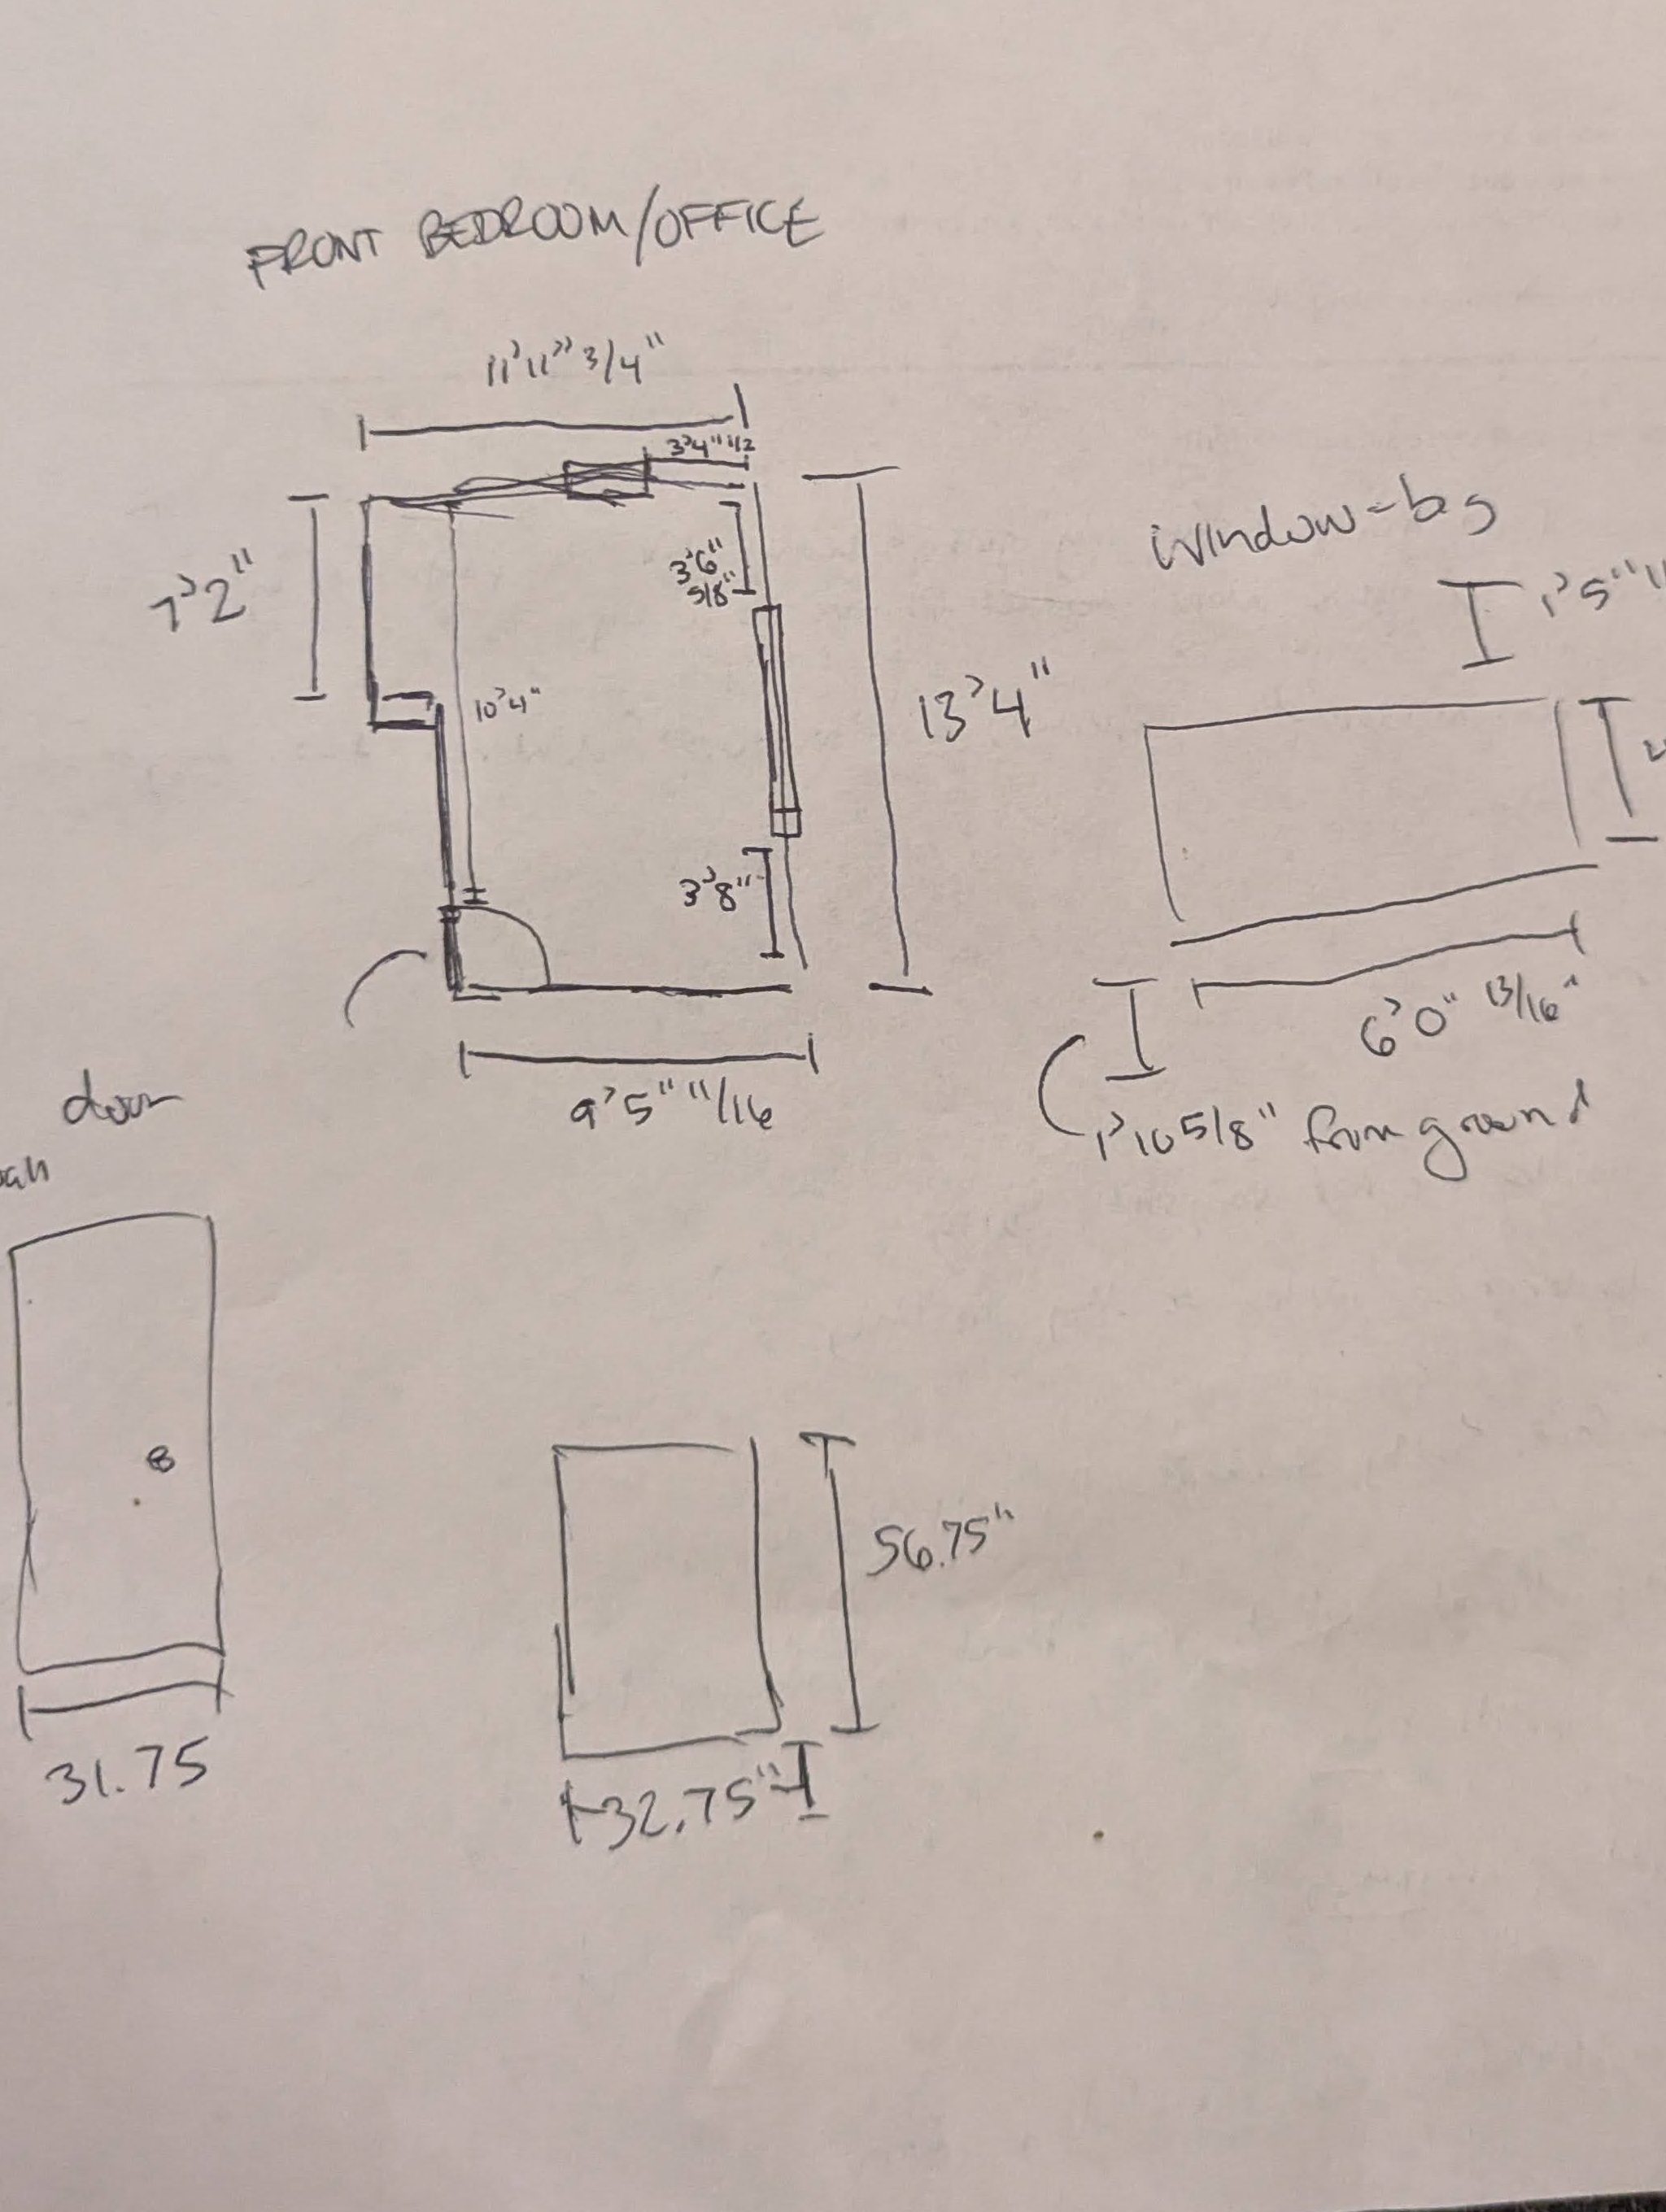
1) I took rigorous dimensions of my space – I measured not just the space from wall-to-wall, but the height of my trim, the spacing of the windows from the floor and ceiling, the depth of the windows, etc. I took a picture of the dimensions, once drawn out, so I always had it on hand. I still had to go back and remeasure things, but it saved me lots of time having an easy reference that I understood.
2) I made a basic Blender mockup following experienced designers’ workflows, focusing first on blocking out the space. I watched some free tutorials on Youtube, but most of what I learned on interior design in Blender was from Rob Dickinson’s Interior Masterclass, which I purchased for $40 on Gumroad. This course shows a start-to-finish workflow so you can learn interior modeling essentials. He makes a Victorian-style room but focuses on the flow and decisions, so you can follow along and still do your own thing. I’ll be completely honest, I got through maybe half of the content before I felt ready to get the “good enough” model I needed and feel confident about making design decisions for my space.
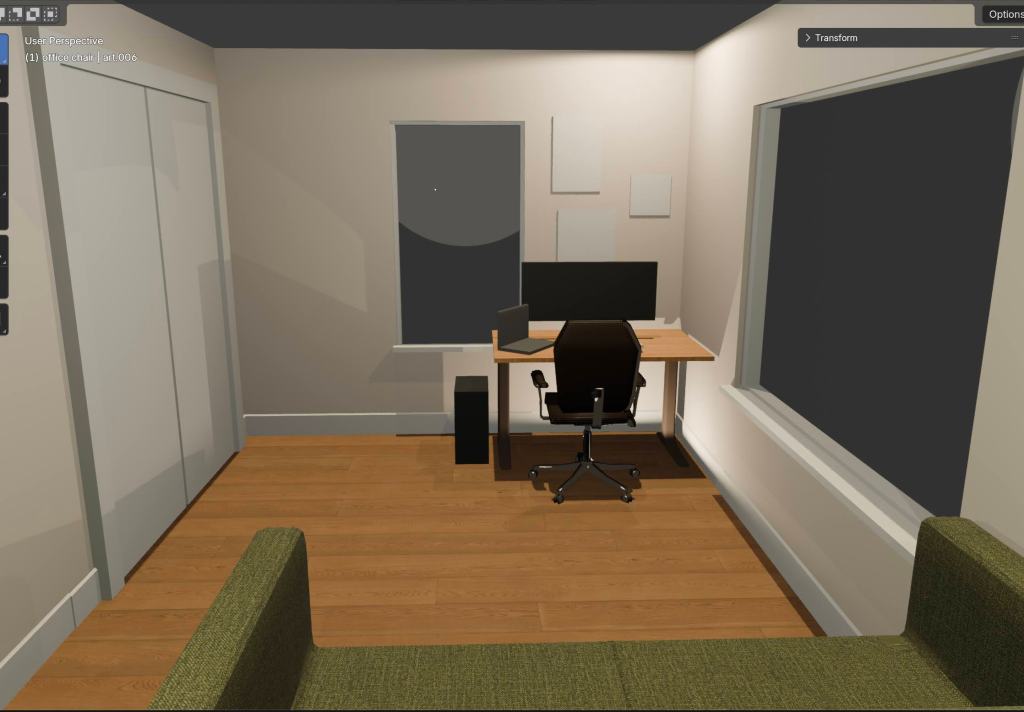
3) Once I blocked out the new layout, I focused on shape and color, with some texturing. For little things, like speakers, monitors, my sewing machine render, I just made very basic cubes, but I made sure to try and make the couch and walls look somewhat realistic, using a wall texture from Poly Haven and blending image textures with colors to see what I liked. When shopping for furniture, since I didn’t want to spend hours making realistic models of something I wouldn’t necessarily buy, I’d honestly just download the image, then apply an image texture to a cube with the same dimensions. We just needed the vibes.
How it went.
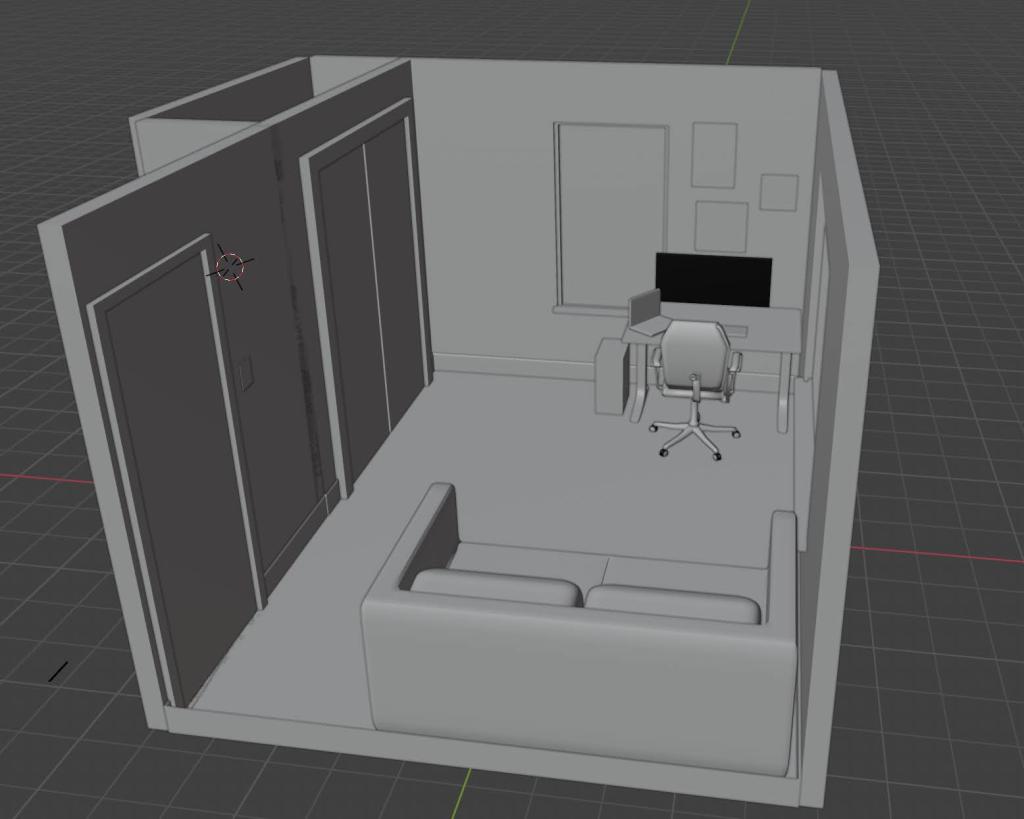
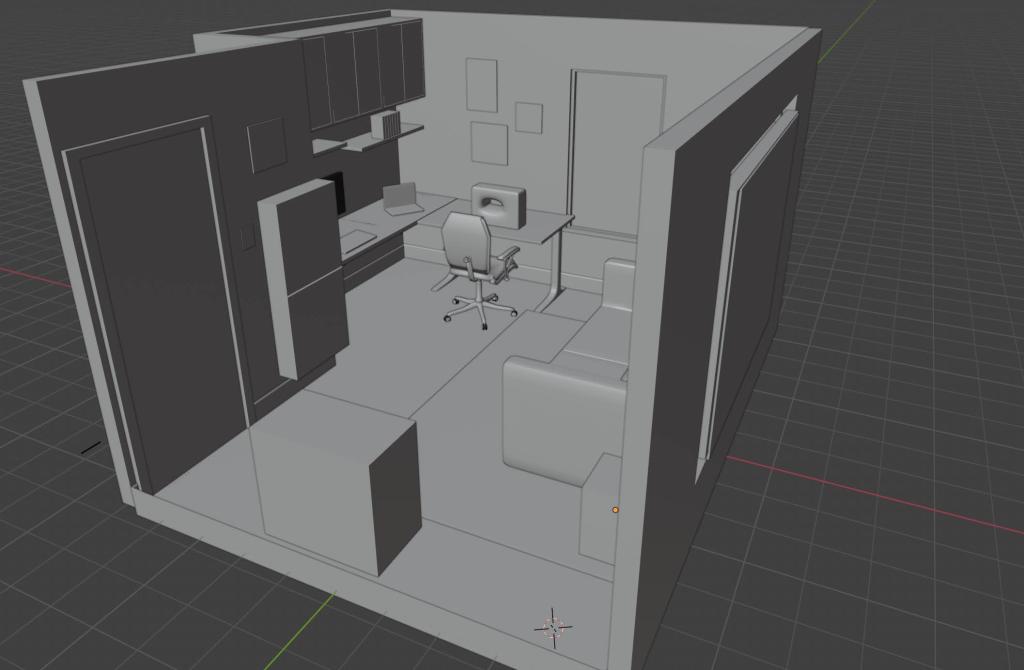
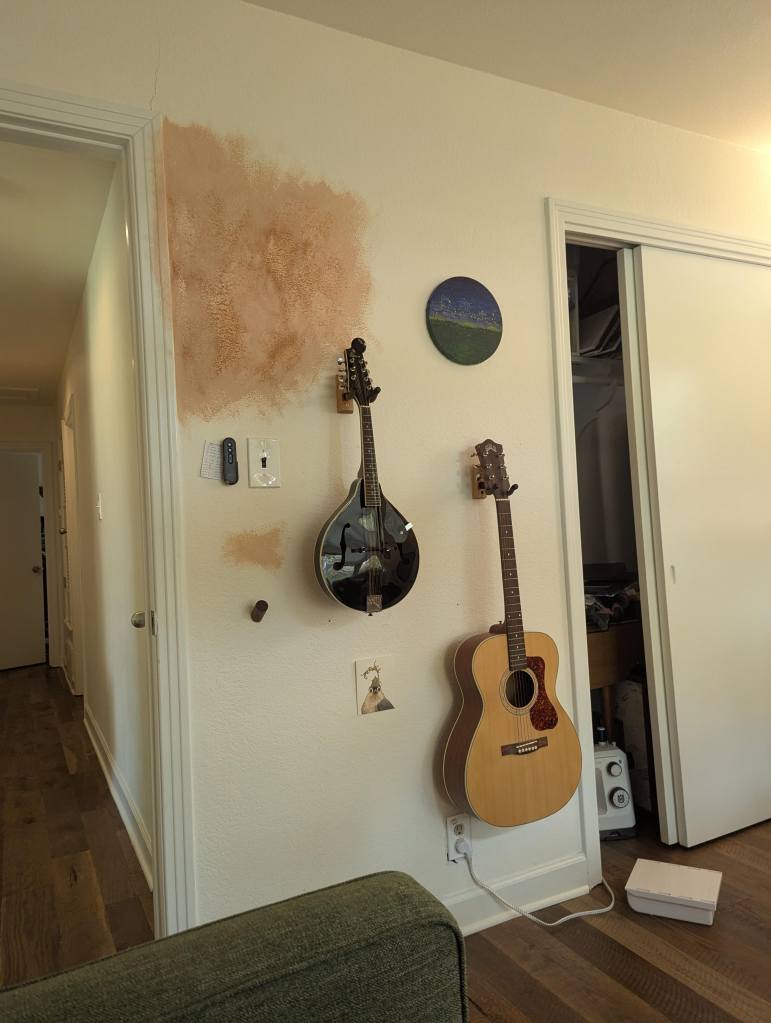
This is the “before” office layout, with the closet still intact and doors built in. The space felt confined and limited potential for work surface area.

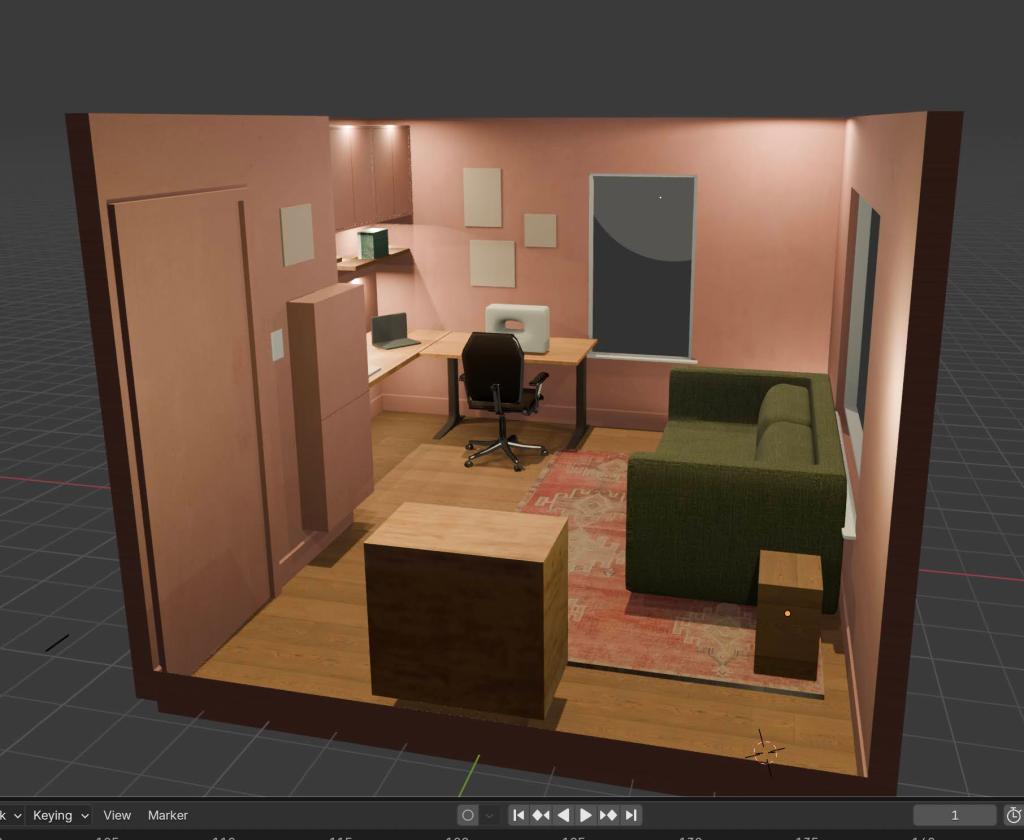
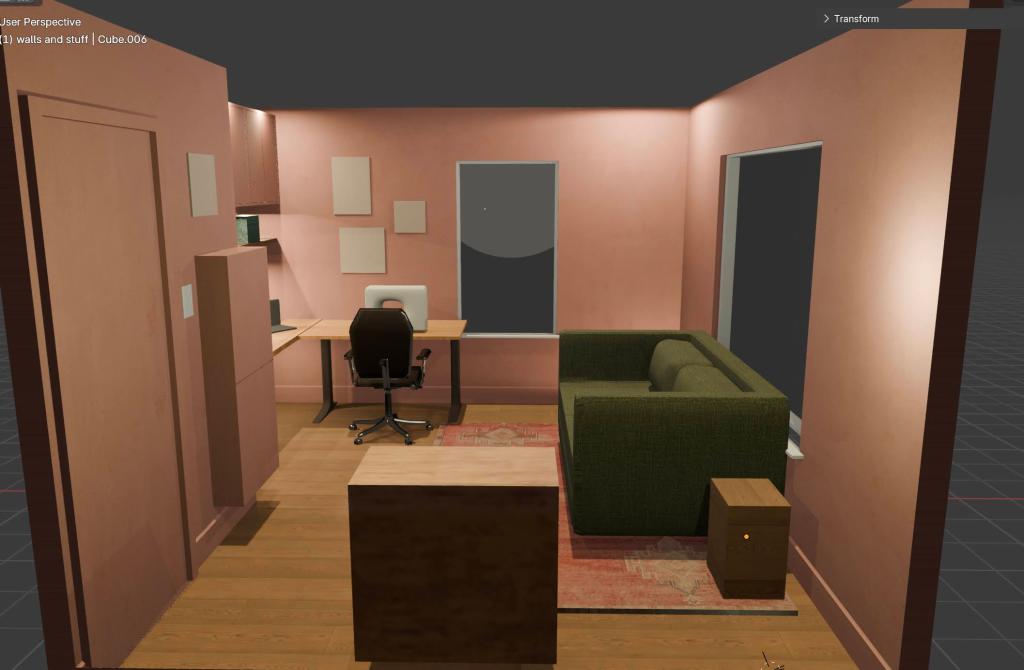
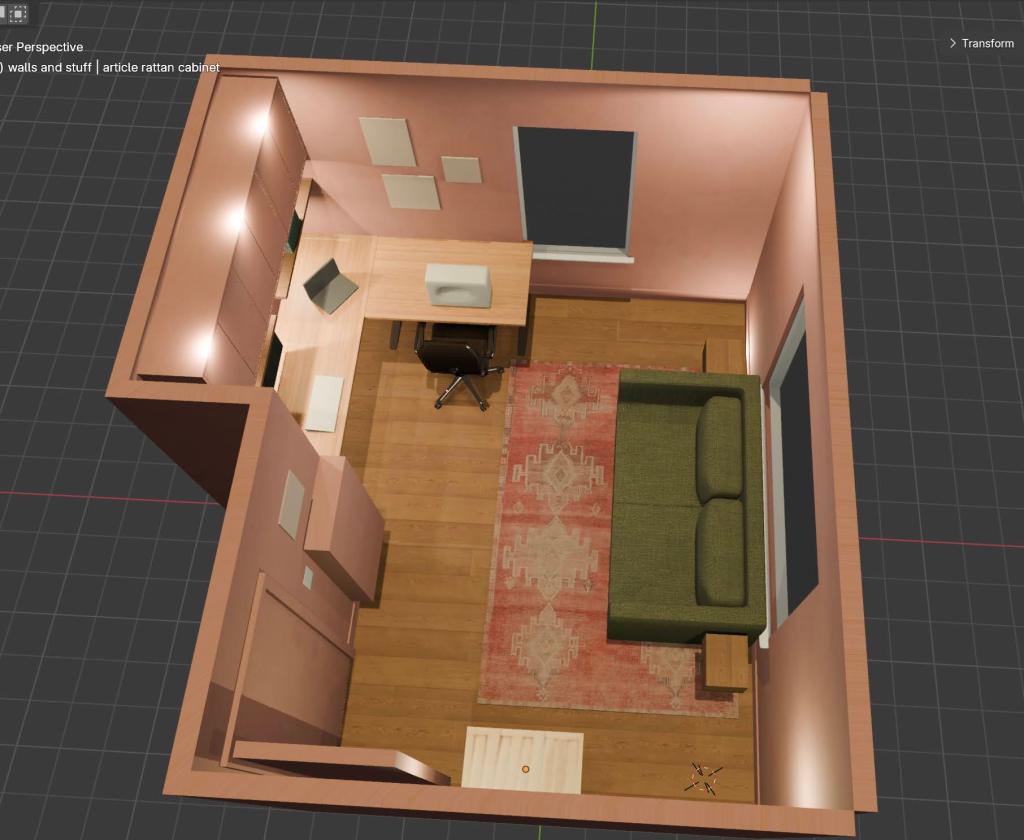
This is the “after” office layout and design idea, with the closet doors removed and closet framing knocked out, and custom Ikea storage.
If I had to estimate how long this took, I probably clocked more than 20 hours in learning the basics in Blender for interior design, making the designs, and making the million tweaks I did along the way. I got frustrated and even bored sometimes when I couldn’t mockup an asset really quickly, or find a free model online, but after learning when I wanted to prioritize finer details versus when I just needed a quick validation for layout, it got much easier.
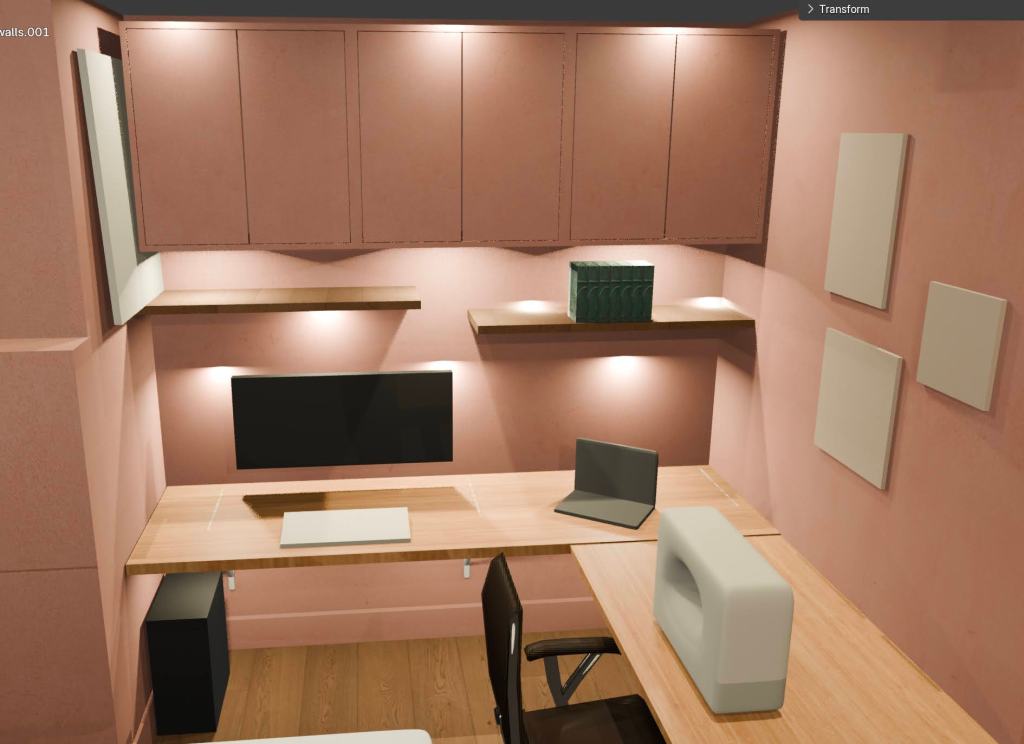
Using Blender was immensely helpful for making decisions with confidence. A friend (who is conveniently a pro interior designer) suggested moving the couch to the center of the window rather than wedged up against the same wall as the door. I was able to mock it up and validate that it looked much better in that position, and confirmed that the sofa bed would still allow movement with the Ikea Besta cabinets jutting out from the opposite wall. I also knew I wanted Eket cabinets above my desk, so I could confirm 3 cabinets would both fit and look suitable once painted to match the walls.

The end result was that I spent much less time mulling over colors and making decisions, without spending more than $40 on design.
The office is not yet done – the actual demo and construction will be it’s own monster post – but you can see the similarities from the design to the actual application. Overall I learned a lot and am happy with the end result.


If you want to learn Blender, don’t hold back. It can be really fun, especially when it’s just for you.
Stay tuned for another post on the actual closet demo and lessons learned along the way.

Leave a comment